HOBloom - How To Automate Your Grow Room For Next To Nothing
Email: hightekgrow@gmail.com
Github: github.com/smoriarty21
Website: hightekco.com
Reddit: reddit.com/r/hightek/
Support HighTek: patreon.com/hightek
Donations: paypal.me/atarimaster
Github: github.com/smoriarty21
Intro
Today we are going to be looking at HOBloom the newest open source product created by HighTek. This software allows you to use a BeagleBone Black to control your lights, heaters, ACs, humidifiers, dehumidifiers and intake/exhaust fans. It also logs data automatically and gives you a nice web interface to monitor and configure everything with. In this article, I will go over how to build, setup and configure everything to get this system up and running in your grow room. We will be setting up and installing the base unit, installing sensors, building smart outlets and learning how to put it all together. I will go over getting your BeagleBone Black up and running on Linux, OSX and Windows.
This step varies a bit depending on what operating system you are running. Below I have added links to the individual posts on setup for each system. Credit for the Linux article goes to Otto Linnemann for his great instructional! The same goes to Derek Molloy for his awesome instructional covering Windows and Linux.What You Need
- BeagleBone Black Starter Kit
- Micro SD Card
- Micro SD Card Reader
- Machine with Windows, Mac or Linux
- USB Wifi Adapter(optional)
- DHT11 / DHT22
Preparing Your BeagleBone Black
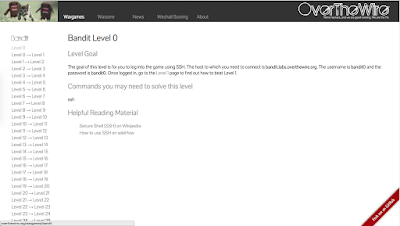
Once you have flashed your device, if you are using Linux or Windows you can find the instructions for SSHing into your BeagleBone below.
Now that you have SSH access to your BeagleBone we will start to prepare our system. The very first thing I would recommend is changing the password for your debian and root users. First, change the password for the current user by running the command "passwd". This will prompt you to enter the current password for the user(temppwd) and then will ask you to set a new password. Once you have changed the password for this user I would also change the root users password. You can do this by running the command "sudo -u root /bin/bash", entering your password that you just changed for your debian user and then running the "passwd" command again to change the password for root. Once you are done setting the root users password type the command "exit" to go back to your debian users terminal session.
Once we have changed our password is setup we need to flash our operating system to the eMMC on the BeagleBone. To do this you need to run the command "sudo nano /boot/uEnv.txt". Once you have the uEnv file open you need to uncomment the line shown below.
##enable BBB: eMMC Flasher:
#cmdline=init=/opt/scripts/tools/eMMC/init-eMMC-flasher-v3.sh
Uncomment the last line from above, save and exit your text editor. Now type the command "sudo shutdown now" to shut down your BeagleBone. Hold down the boot button on the BeagleBone and press the power button. This will make the lights flash for about 30 minutes and then all four lights will go out. Once the lights are out you may remove the SD card and restart your BeagleBone Black. For images and more detailed instructions on the boot and power button sequence check out this article.
Now that we are no longer running our operating system off of our SD card we can format it and use it to store our code and database. This will also give us enough storage to run the client directly on the device. Put the SD card back in your Windows/Linux/OSX machine and format it using FAT. Shutdown your BeagleBone and insert the SD card then start it back up. Once you are back into the BeagleBone via SSH we can format the SD card, mount it and set it to mount automatically on reboot.
Once your system comes back up with the SD card inserted, run the command "sudo fdisk -l". This should give you an output something like the image below.

In the image above my SD card is "/dev/mmcblk0". From here on out I will refer to it as /dev/device, whenever you see this insert your device id from the output on your machine. It may not and likely will not be the same name as mine.
In order to format our drive we need to first run the command "sudo fdisk /dev/device". This will open fdisk a linux command line tool for managing drives. Once in the fdisk console you can type "m" to print out the help menu and show you the list of commands as seen in the image below.

Our first step is to remove any old partitions on the drive. To list the partitions(if any) we type the command "p" to print the current partition table. This will show you something like the image below. Yours may only have one partition or it may have more it just depends on how your drive was previously partitioned.

If you have any partitions on the list when you run the "p" command you can run the "d" command to delete partitions. We are just clearing all of them so you can just keep entering the "d" command and pressing enter to let it delete the default partition. The default is always the last partition on the drive. Once you see that it is deleting partition number one you can stop(after deleting partition one). If you are confused just keep running the "d" command until you get an error about there being no partitions.
Now we are going to create one partition that takes up our entire drive. To do this run the "n" command. You may press enter through the questions and allow it to use the defaults. Once we have the partition created we just need to write the partition table and exit using the "w" command.
Here we will find ourselves back at the Linux terminal and out of fdisk. We now can run the command "sudo mkfs.ext4 /dev/devicep1" to create an ext4 filesystem on your new partition. Note here you need to add the partition number to the command, this means you have to append "p1" to the end of your root device path you have been using previously. This can be seen in the example command above. Next, we need to make a folder to mount our partition and hold our code. For this we run the command "mkdir /home/debian/repo". The only step we have left is to set the partition we just created to mount every time we boot our BeagleBone. To do this we need to edit the fstab file using the following command: "sudo nano /etc/fstab". Once you have the fstab file open in your text editor add the following line to the end of the file: "/dev/devicep1 /home/debian/repo auto rw 0 0". Reboot your BeagleBone using the command "sudo reboot now".
Once your BeagleBone comes back up and you can SSH back in you should see your partition in the mounted partition table by typing the command "mount | grep /dev/device". We are now ready to start installing all our dependencies and grabbing our source code.
To setup wifi using a USB wifi adapter follow the guide here on the HighTek wiki page. You may also hardwire your system but, I don't suggest the wireless option.
HOBloom uses sqlite to keep track of sensors, appliances and to log data. This database is never shared and is always kept internal to your device. For this to work we need to install sqlite on our BeagleBone. The Beaglebone must have an internet connection from this portion of the install forward. Run the command "sudo apt-get update; sudo apt-get install sqlite3 git". This will update apt and then install the sqlite3 package as well as the git package that we will need to grab our code on your system.
In order to run the client we need to upgrade the nodejs install on our BeagleBone. To do this you need to download the latest ARMv7 binary from here. Running the commands below will bring us into our repo directory and download the nodejs ARMv7 binary onto our SD card.
cd ~/repo
wget https://nodejs.org/download/release/v7.8.0/node-v7.8.0-linux-armv7l.tar.xz
tar xvf node-v7.8.0-linux-armv7l.tar.xz
sudo apt-get remove node
sudo rm -rf /usr/bin/node /usr/bin/npm
sudo ln -s /home/debian/node-v7.8.0-linux-armv7l/bin/node /usr/bin/node
sudo ln -s /home/debian/node-v7.8.0-linux-armv7l/bin/npm /usr/bin/npm
These commands will download the correct version of node for our system, remove the old version of node and npm and link our new binary to the main path making it easier to use.
Our system is now ready to clone the HOBloom repo and start getting the server up and running. In order to get the code we need to first enter our SD card by running the command "cd /home/debian/repo". We can now grab our code by running the command "git clone https://github.com/smoriarty21/hobloom.git". We should now be able to run "cd hobloom" and see our code base by using the "ls" command. This should output the files below.
Now that we have our code our very next step is running the setup script to get our config file and database setup for us automatically. In order to do this, we need to run the command "sudo python setup_db.py" and allow the script to run. When it asks you about your temperature sensor give it any name you would like. For the type enter either "dht11" or "dht22" depending on what model you have purchased. When asked for the pin enter "P8_7", once we are done setting up the software we will shut our unit down and install the sensor in the pin we just specified. The script should complete and now you should have your database and config files all setup to get the system running. The last thing we need to do for the server is installing the node dependencies. We can do this by running the command "npm install". This may take a bit to finish but should complete error free.
Before we can hook up our temperature and humidity sensor we need to shut our BeagleBone down using the command "sudo shutdown now".
In the images below I will be hooking up the dht22 but the setup for the dht11 is exactly the same. In the images below I connected three jumper wires to my dht22 and zip tied it to my case. This is the same case in the kit linked above and you could set it up the same if you would like. You can see the wires hooked up in the image below.

Those three pins in the image from left to right are ground(GND), 5V power(VCC) and data(DAT). For the rest of the setup, you will need to refer to the BeagleBone pinout diagram. This diagram should be fairly easy to read. The pins on the left side are all "P9_" the number in the yellow or white box. The same goes for the right side except the prefix has changed to "P8_". The ground cable can be connected to any of the pins labeled DGND. This means we can use either P9_1, P9_2, P9_43, P9_44, P9_45, P9_46, P8_1 or P8_2. In the image above I have it plugged into P9_2. The next pin is power and can be plugged into any pin labeled VDD_5V(P9_5 and P9_6). The data pin will go into P8_7 as that is what we entered above in the setup script. Below are more images of my sensor connected to my base unit.


Now that we have our temperature and humidity sensor installed we are ready to get our unit up and running. Power back on the BeagleBone Black and enter the directory with your code(cd /home/debian/repo/hoblom). Run the command below to start the server.
sudo node hobloom.js
Now that our server is running we want to get the client up and running so that we can ensure the system is working as it should be. For this, we need to spin up a new ssh session into our BeagleBone just like we have in the past. enter the client directory inside the main repo using the command below.
cd /home/debian/repo/hobloom/client
Once inside this client directory run the command below to install the dependencies for the client.
npm insall
Before we are ready to start the client there is one last thing we must do. For this step, you will need to know the IP address of your BeagleBone. It is the address you have been using to SSH into the device. We will need to update our clients GlobalConfig file to point to the IP address of your specific BeagleBone. Use the command below to open up the GlobalConfig.
nano app/classes/GlobalConfig.ts
When you run this command you will be shown the file in the picture below.

Here we need to navigate to the line "export const IP: string = '192.168.0.21';" and change the IP from 192.168.0.21 to whatever IP you are using for your device. Once you have changed this IP address to your BeagleBones IP address we are ready to start the client. In order to do this, we need to run the command below.
npm start
This command will run and first you will see the message shown below.

The important part in the image above is the sections labeled "Access URLs". You can see mine says the external URL is 'http://192.168.0.21:3001'. This is the address you need to type into your browser in order to see the client. You can now point your browser at that URL and view your client. You should see a dashboard like the image shown below.

As always thank you for reading and check back often for more. Next, I will be going over creating smart outlets to control your appliances and setting up the fire detection sensor.
Setup Your Smart Outlets
If you would like to setup smart outlets that allow you to control your lights and appliances check out my article here.

Comments
Post a Comment